
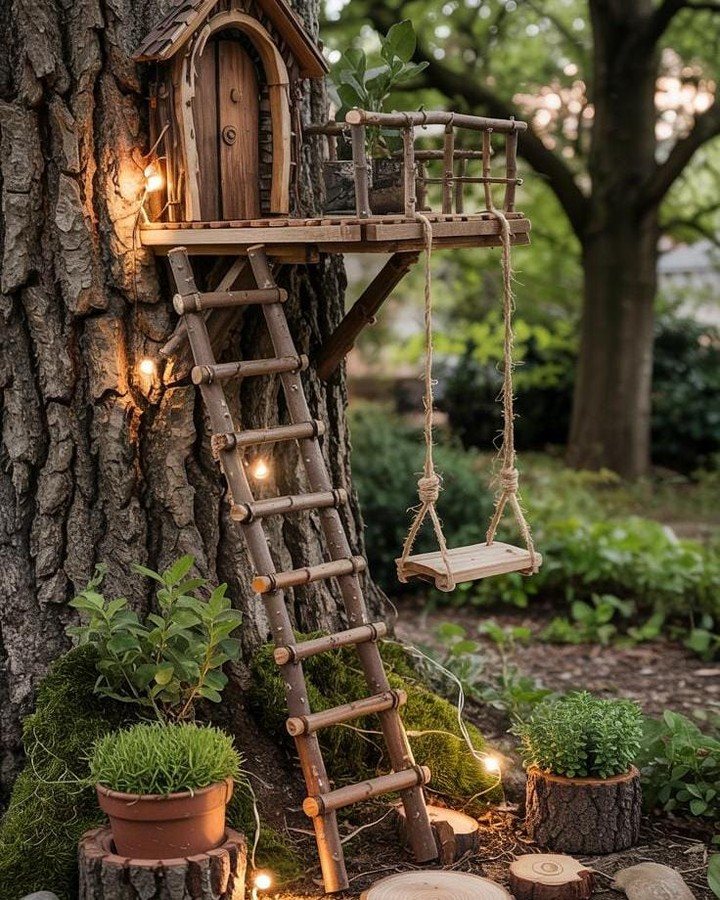
These fairy gardens run from a teacup on a desk to a full village in a leaking barrel, with most landing somewhere between a cracked pot and a hollowed stump.
What picks one over another is whether you need it to stay put or move when frost comes, since the teacup versions head indoors while the stump house stays until the wood rots through.
I spent about $300 on my greenhouse build, but a broken pot you already own plus a few grocery-store succulents keeps the smallest here under ten dollars.
1. Broken Pot Fairy Garden
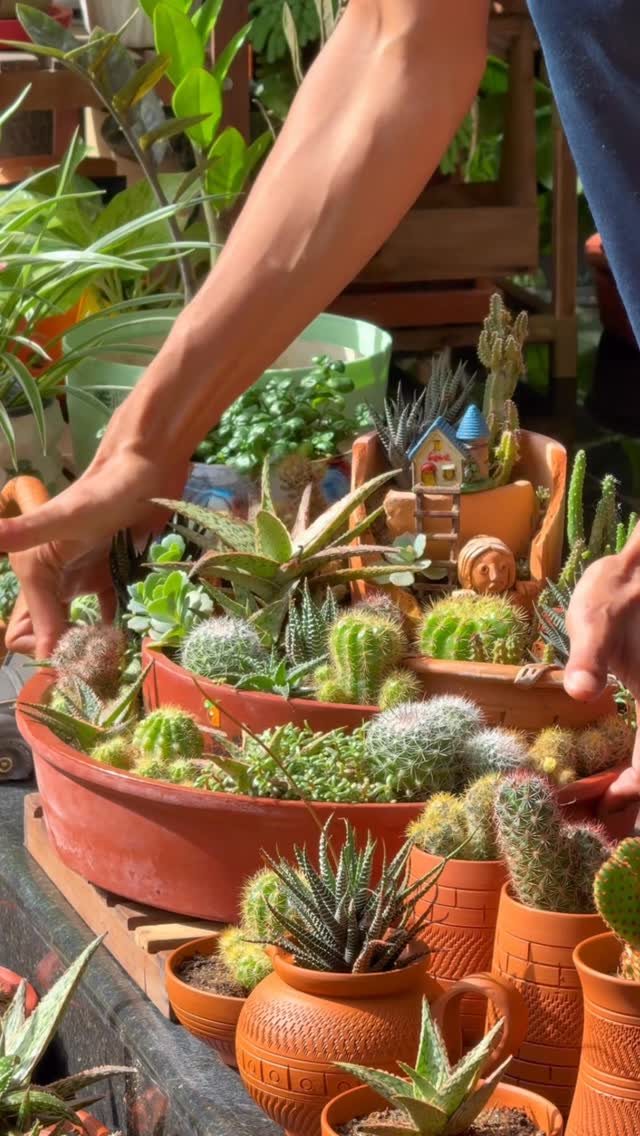
A broken terracotta pot becomes a terraced hillside when you lean the shards against the remaining walls, layering soil between each shelf.
I built mine with three levels, wedging cacti and succulents into the gaps where they stay dry enough to thrive. Fast-draining potting mix matters most in humid climates; I add extra perlite to keep roots from sitting wet.
A miniature ladder leans against the tallest shard, and the fairy house tucks into the lowest cave where roots stay coolest.
This suits anyone with one cracked pot they cannot throw away and a sunny windowsill or patio corner. A broken pot you already own plus a few small plants keeps this project cheap.
2. Upcycled Fairy Garden
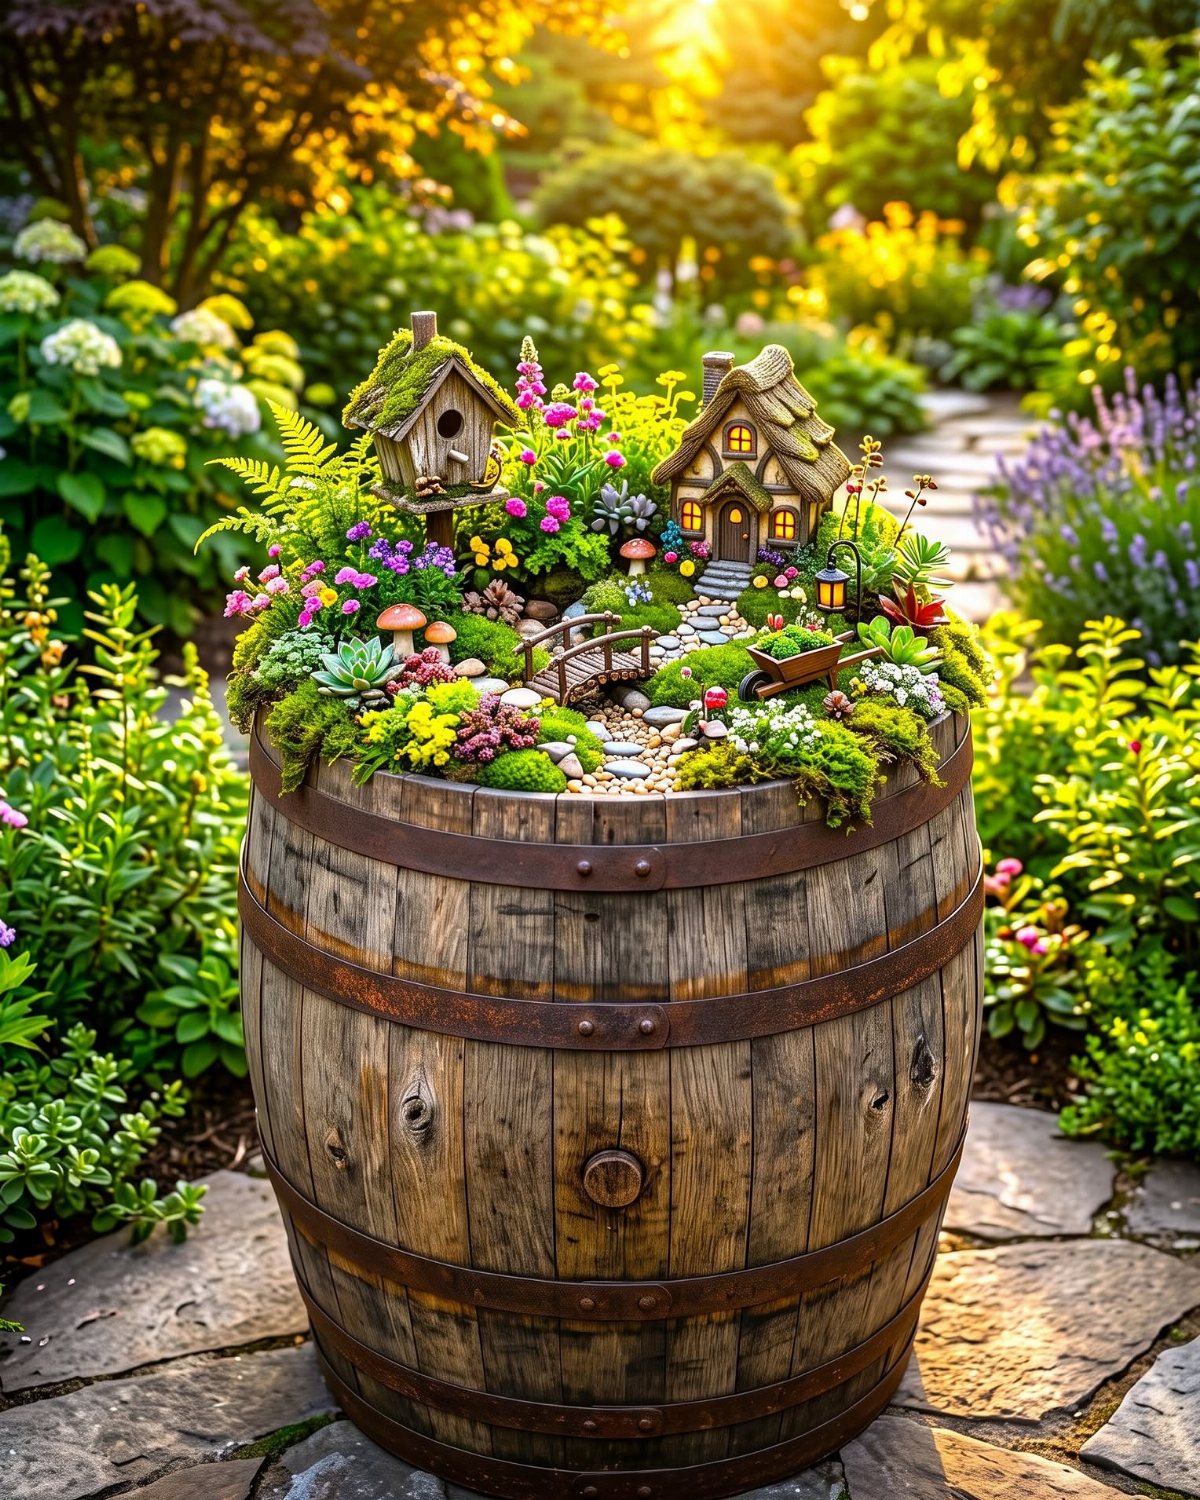
A wooden barrel with rusted bands and a leaking bottom makes a natural frame for a village scene. I drilled drainage holes through the soft bottom of a barn-sale barrel and filled it with potting soil to the halfway mark.
Pea gravel paths keep tiny feet dry after watering, and the miniature bridge spans a shallow dish I sunk flush with the soil.
Old wheelbarrows, wagons past their prime, or even hollow logs work the same way: the container’s wear becomes the garden’s character. Check thrift stores in January when garden donations peak.
Avoid anything treated with creosote; it leaches into soil where kids will poke fingers.
3. Miniature Plants
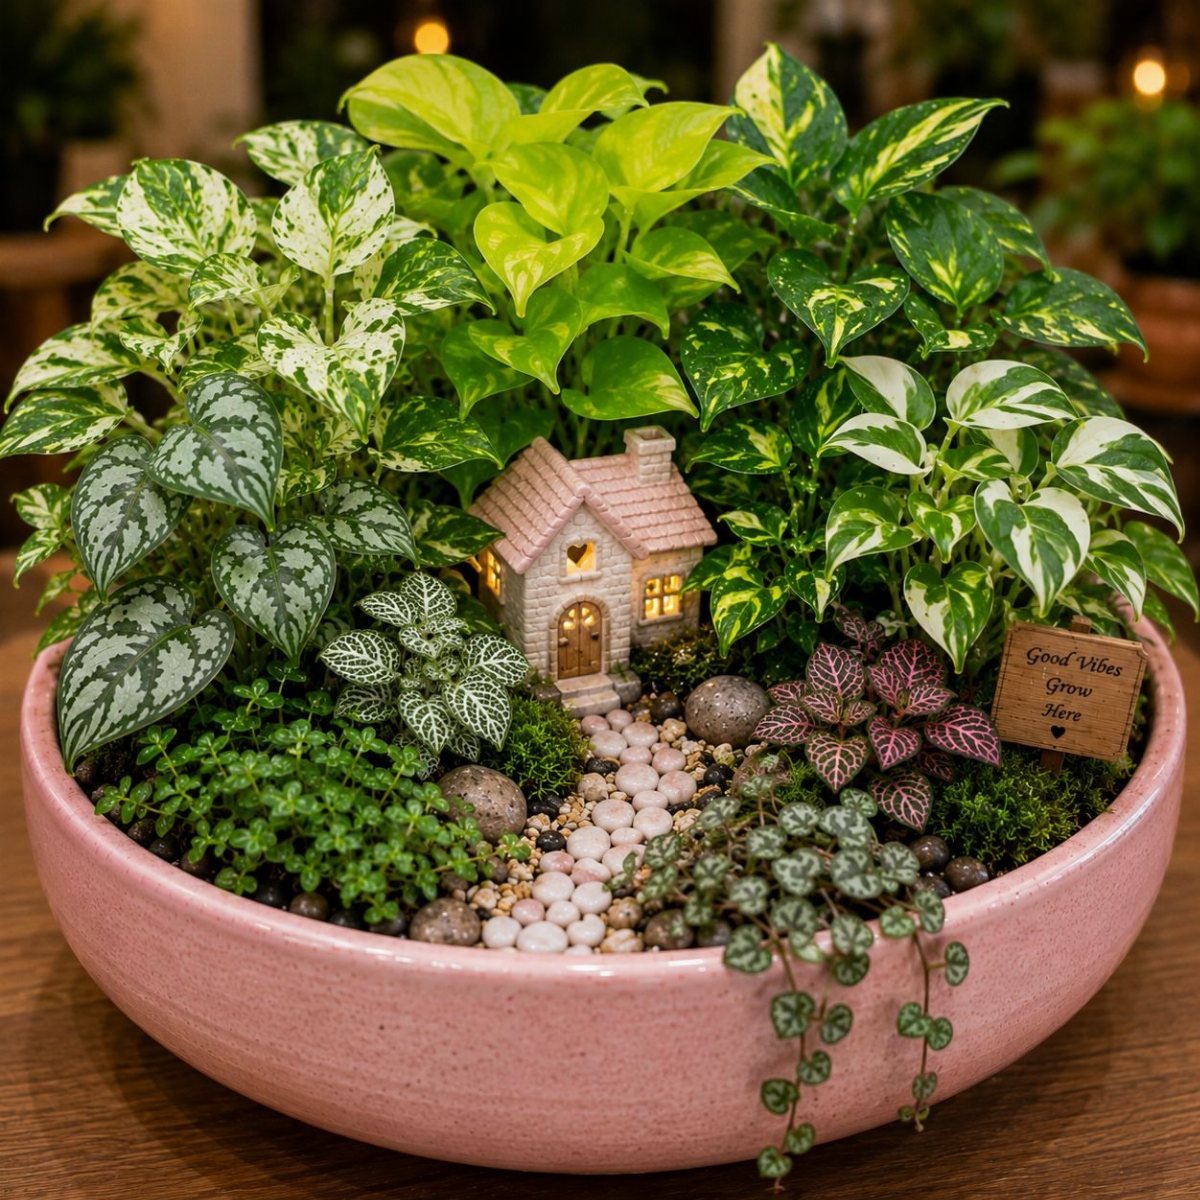
Small plants stay small only if you choose ones that want to be.
Creeping thyme spreads flat like a lawn for fairy feet; miniature roses stay bushy in 4-inch pots from the grocery store if you hard-prune after each bloom cycle.
Succulents forgive a missed watering but rot in shade; variegated trailers like pothos want the opposite.
I arrange by water need, not color. Grouping succulents together in a shallow bowl works because they all want the same infrequent soak.
Mix a thirsty fern in and something dies by August. For a first fairy garden, buy three plants from the same nursery shelf; they likely share care habits.
4. Fairy Garden Accessories
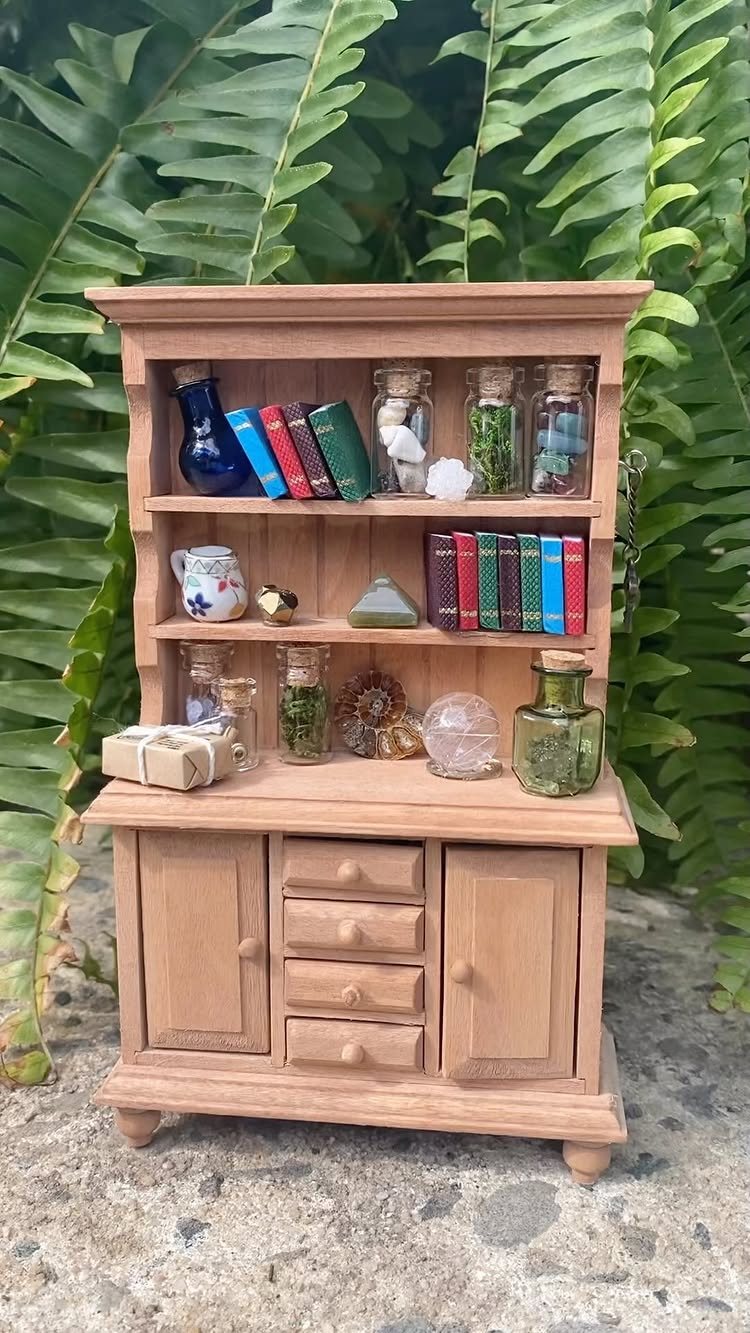
Scale ruins more fairy gardens than weather does. A miniature hutch with books smaller than postage stamps reads as a real piece of furniture at fairy scale.
I once ordered a "miniature" bench online that arrived big enough for a squirrel. Now I check listed dimensions against a ruler before buying, and I read reviews for scale complaints.
Outdoor-rated accessories survive rain; indoor resin warps and fades by July. Dollar Tree stocks garden miniatures in January and February, and the turnover is fast.
Pebble paths and sand need no purchase at all. One well-scaled house beats a crowd of mismatched furniture.
5. Fairy Garden with a Story

A bookshelf pressed into mossy tree roots suggests fairies who read, who climb ladders to reach top shelves, who left a book open mid-page.
A tiny "closed" sign on a painted stone door suggests a fairy proprietor who stepped out, giving viewers something to finish in their own heads.
A pebble path leading away from the door, with a tipped wheelbarrow beside it, carries that stepped-out story a little further.
A woodland theme needs only moss, ferns, and twigs from your own yard. A beach version uses sand and shells; a village needs more structures but tells itself through proximity.
Pick one anchor detail and let the viewer imagine the rest. Kids will supply better stories than you can build.
6. Fairy Garden with a Tree Stump

A stump with its heart rotted soft becomes a natural room: hollow out the remaining shell, line with weed barrier, and fill with potting soil.
A bark roof made from layered shingles peeled from a fallen branch and tacked with weatherproof glue sheds rain through several seasons before replacement.
A 22-inch diameter bowl sunk into the top would work for a formal planting, though I prefer soil direct against wood.
This integrates where a container intrudes. A stump house takes an afternoon to build and lasts until the wood finishes decaying, longer in drier zones than in wet ones.
Best for woodland edges where a plastic pot would look stranded.
7. Fairy Garden with a Beach Theme

Sand and shells turn a corner of your yard into a shoreline no matter how far you live from water.
I like an old glass canister or wide bowl for the base; thrift stores usually have them for a few dollars. Bags of sand from a dollar store fill the bottom, and shells you collect yourself cost nothing.
A miniature Adirondack chair painted aqua stands out against white sand better than the plain white version. The Little Hedgerow on Etsy carries beachy miniatures if you want pieces that match.
Tiny battery lights strung along the edge keep it alive after dark.
This one suits renters and balcony gardeners especially; the whole thing moves indoors before frost.
8. Twig Chair Fairy Garden

A twig chair brings in the woodland feeling without building an entire house from bark.
Fallen branches thicker than a pencil and a handsaw are all you really need; antique stores sometimes have them for pocket change if you want a head start.
Cut leg pieces, arm supports, and weave thinner twigs across for the seat and back. Hot glue holds it fast if an older child is making it; white glue works too, just clamp overnight and wait.
A small wooden drawer made from trim scraps sits beside mine as a planter. A single gnome and a tiny scarecrow finished the scene in an afternoon.
9. Container Fairy Garden
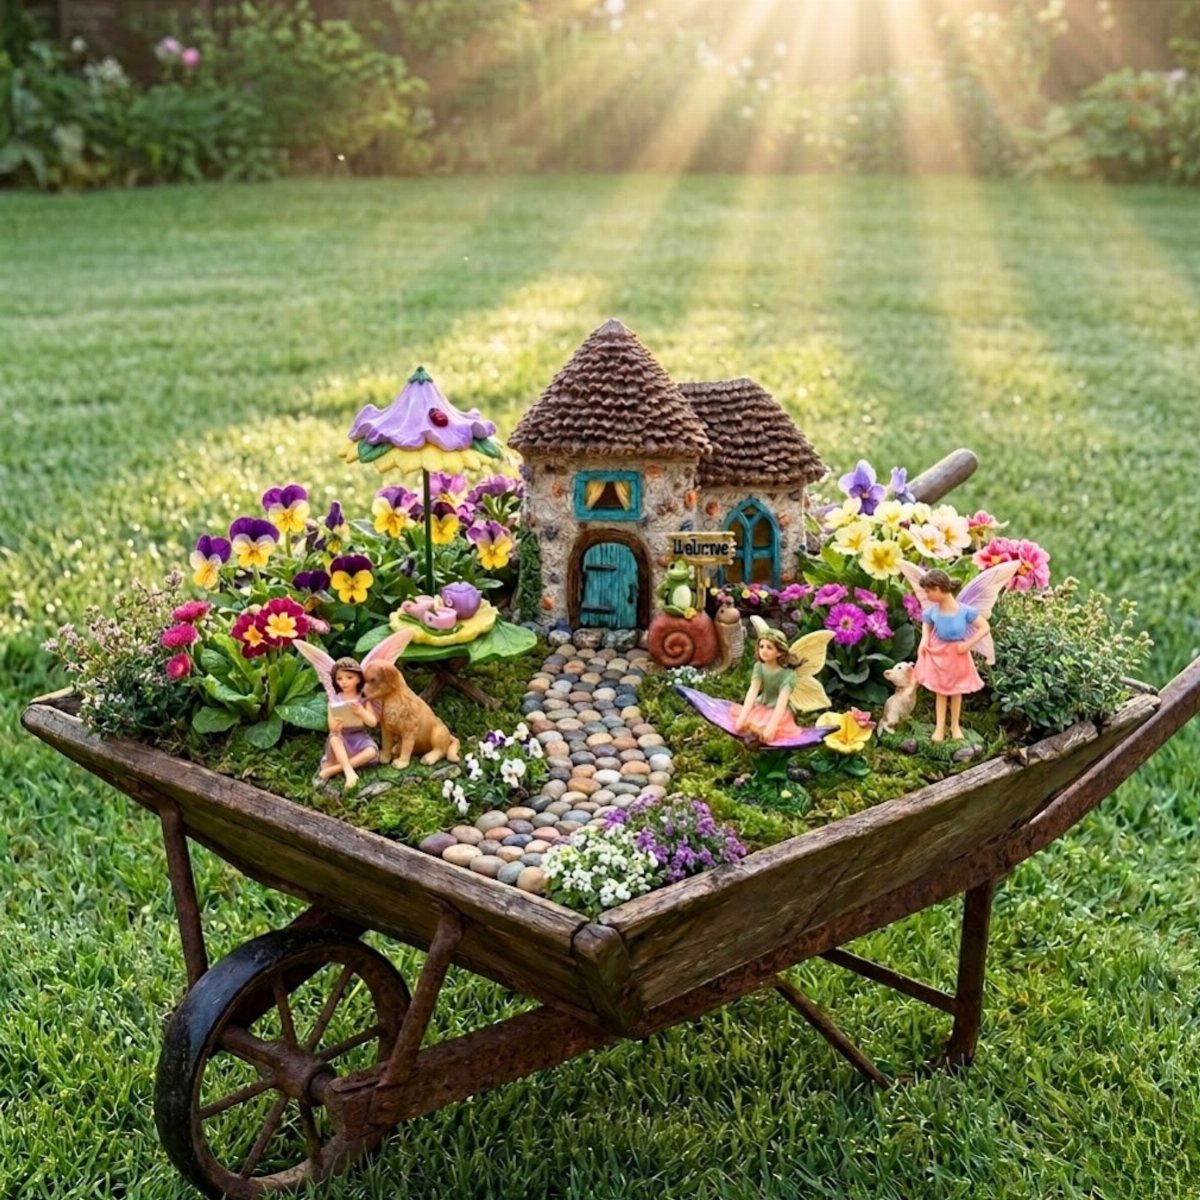
The container matters less than you’d think; drainage is what counts. Cracked flower pots, old wagons with rust holes, birdbaths turned upside-down, and Rubbermaid bins punched through at the bottom all work fine.
Rocks in the base keep roots from sitting in water. A storage bin runs bigger than most dedicated planters, which makes it ideal if kids want to add dinosaurs or Lego figures alongside the ferns.
Wheelbarrows give height and a story; the weathered metal reads as instant history.
Check that your spot gets the light your plants need before you commit the soil. A full container garden gets heavy fast; plan where you want it before you fill it.
10. Theme-Based Fairy Garden
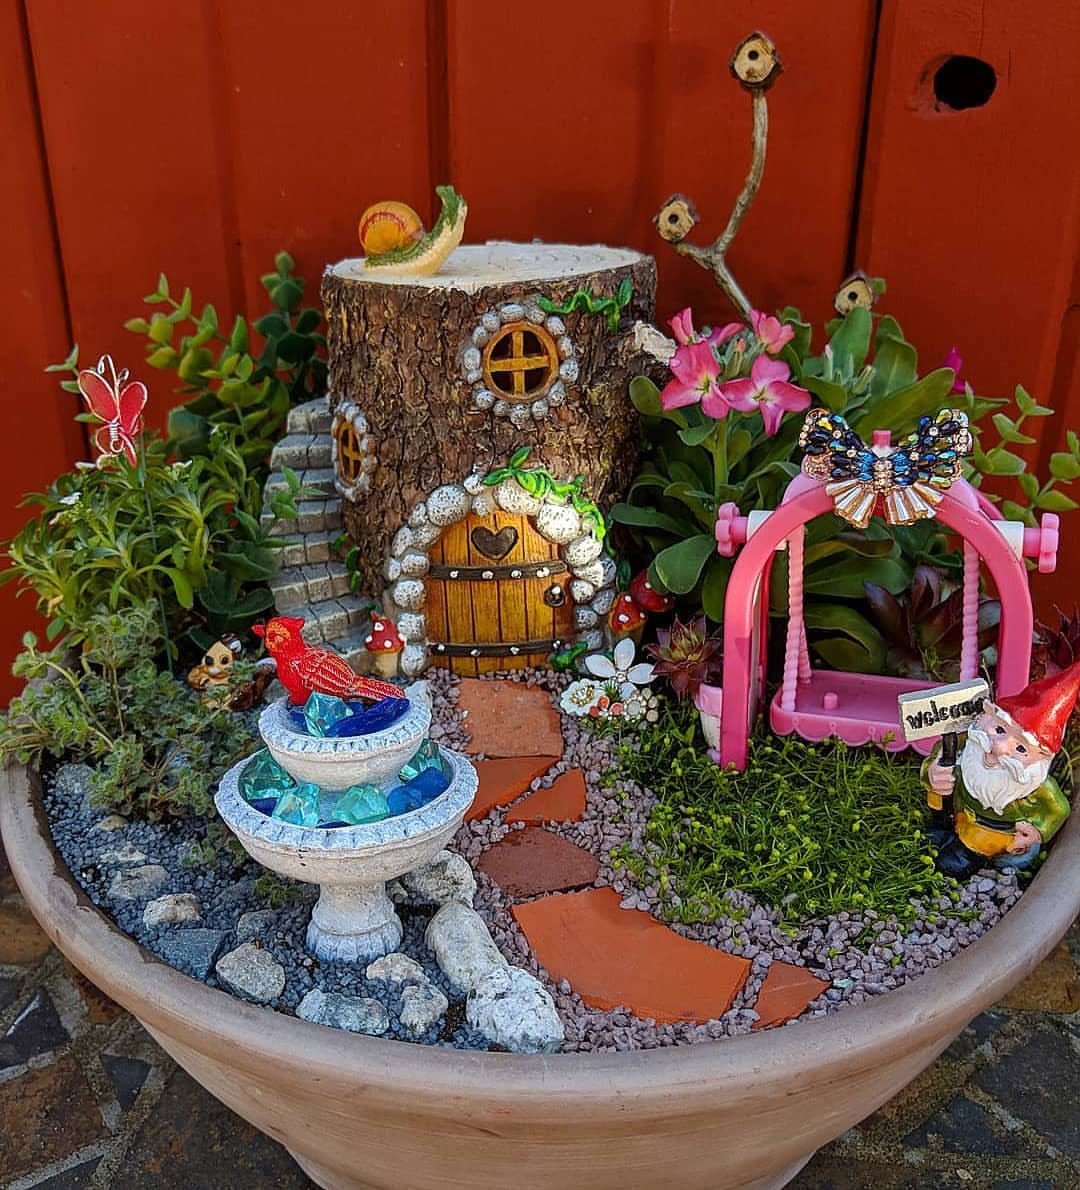
A theme keeps you from buying every miniature that catches your eye and ending up with a scattered look.
I start with one anchor piece: a red barn for a farm scene, a moss-covered stump for woodland, a clay shell for beach. Everything else follows that choice.
Plastic animals your kids already own stock a farm garden without new purchases. Painted stones become village shops; ferns and moss suit forest settings; evergreens shift color through seasons and keep the scene alive in December.
You do have to stick with it once you pick one. A themed garden looks finished faster, but you will pass up pieces that do not fit.
For renters or the indecisive, I would still build one; the container itself limits the scale, so you are not locked in forever.
11. DIY Fairy Houses
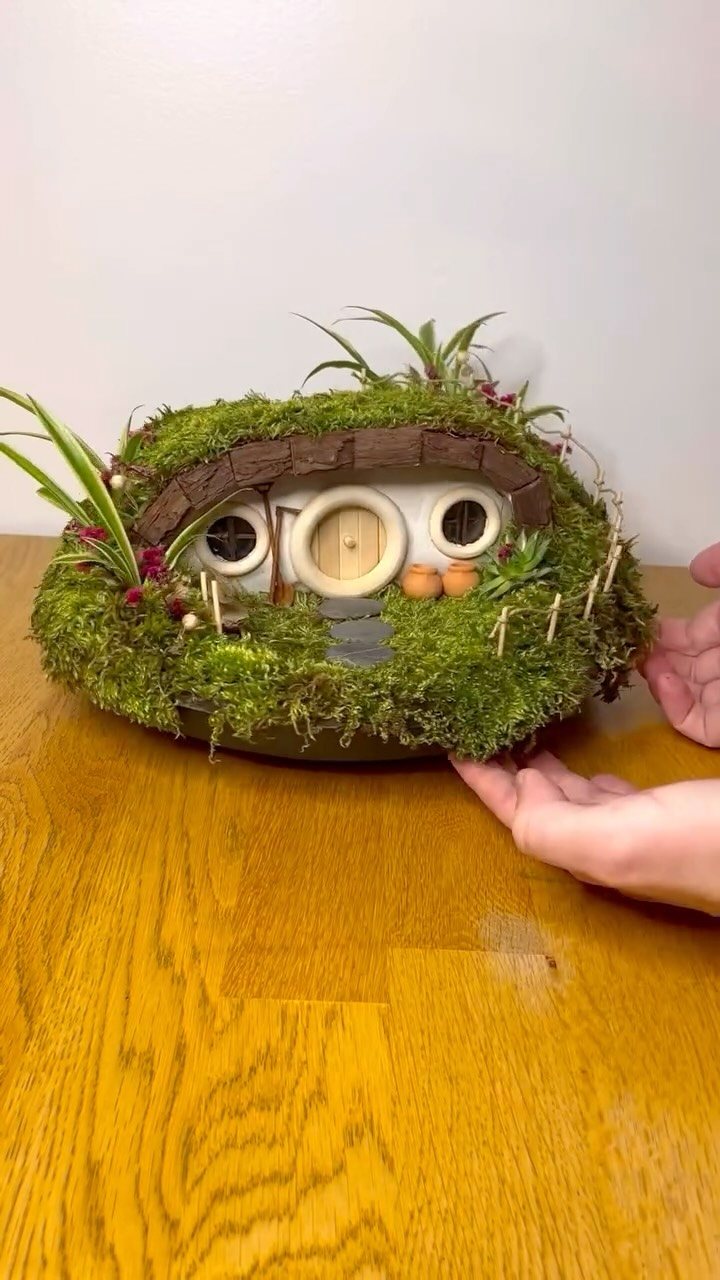
Clay pots flipped upside-down make excellent toadstool houses once kids paint the domes in reds and spots. I have also built from popsicle sticks layered like log cabins, and from recycled glass jars wrapped in moss and bark.
The jar method comes from a maker who posted three versions online; their technique hides the glass entirely so only a round door and windows show through.
Any of these need weatherproofing if they sit outside: a coat of exterior sealant on wood, drainage holes in clay, silicone around jar openings.
A hobbit-style house covered in living moss takes more patience than skill. Start small; a single moss-covered pot is honest practice.
12. Fairy Garden Gnomes

Gnomes split the room. Some fairy gardeners treat them as cousins to the fae; others find them too cartoonish next to delicate wings and twig furniture.
I land in the middle: a gnome or two adds weight and humor, a dozen looks like a lawn ornament convention.
Air-dry clay lets you shape your own couple for the cost of the clay block, and they carry personality no factory mold matches.
Paint them after a full day of drying, seal with matte varnish, and set them near a miniature campfire or ladder against a tree.
For a quieter scene, I would place just one, half-hidden behind a leaf, as if surprised by the viewer.
13. Fairy Garden in a Teacup

A teacup fairy garden shrinks the whole idea down to something you can hold in one hand. That saucer underneath catches drainage and gives you a stable base for a windowsill or desk.
A diamond bit and running water keep the porcelain from cracking when you drill the drainage hole; go slow and let the bit do the work. No drill?
A thin layer of pebbles below your soil mix buys you time between waterings.
Moss and a single tiny succulent or two fill the scale; anything taller than the cup’s rim breaks the illusion. A fence and house smaller than your thumb nail keep the proportions honest.
This one lives inside year-round, which matters for apartment readers who want the garden but lack the yard. The trade is size: you are tending a scene, not walking into one.
Tips for Creating a Fairy Garden
Start with a container small enough to carry. A finished scene on a windowsill or stump beats a half-planned yard patch you never get around to filling in.
Light determines plant choice before any accessory enters the cart. Watch your spot through a full day.
Direct sun in the afternoon opens the door to succulents and thyme; a north-facing stoop limits you to moss and ferns. Match the plant to the place, not the other way around.
Plant before you decorate. Soil settles, roots spread, and a fairy house placed first blocks the trowel later.
Drainage holes matter in every vessel, even a teacup: drill one, or layer pebbles thick enough to buy time between waterings.
Scale trips most beginners. A house bigger than its door mat breaks the spell.
Hold a quarter next to online listings; if the piece dwarfs the coin, it dwarfs the garden.
Involving Kids in Fairy Gardening
Hand them the accessory catalog and ask what happened just before the fairy left the door open.
Let them choose the plants, with one guardrail: water need. A child who picks a succulent and a fern in the same pot learns the hard way by August.
Group by thirst, then let color and shape fall where they may.
The container itself carries history. A wagon they outgrew, a bin from a moved fish tank, a drawer from a broken dresser: these become settings before soil touches them.
Kids recognize their own objects in a new role faster than they bond with a purchased resin cottage.
Air-dry clay shapes gnomes with fingerprints and lopsided hats. Factory molds smooth that away.
Maintenance of Fairy Gardens
Container gardens dry faster than ground beds. Check with a finger to the first knuckle; if it comes up clean, water until it runs through the holes.
Plants outgrow fairy scale by midsummer. Trim before they swallow the path, not after the door disappears behind leaves.
Accessories weather: resin fades, metal rusts, glue softens. Wipe pieces when you water, and bring the most fragile under cover before hard frost.
A garden that looked tired in October revives with a fresh layer of sand, a shifted house angle, one new figure placed where last year’s sat.
Indoor gardens want the same rotation you’d give any houseplant. Quarter-turn the teacup when you water so moss grows even, not reaching.
Finding Fairy Garden Supplies
Craft stores stock fairy goods in the floral aisle and the miniature dollhouse section. Hobby Lobby runs both; their fairy items count toward floral sales, so watch the rotation.
Stock turns fast, and the good scale pieces go early.
Old glass canisters, chipped teacups, wooden drawers from broken furniture: these cost less than a single manufactured house and carry built-in story.
Amazon lists dimensions; read them.
Garden centers with fairy sections usually stock compatible small plants too. Buy plant and pot in one trip, and you know the fit before soil meets root.
Frequently Asked Questions
What are the rules for a fairy garden?
Drainage matters more than the container itself. Punch holes in the bottom of whatever you use, and add rocks below the soil so roots never sit in water.
Match plants by their water and light needs; a thirsty fern mixed with succulents means something dies by August.
What are some ideas for an inexpensive fairy garden?
A broken terracotta pot you already own, layered with soil between its shards, costs almost nothing. Thrift stores get garden donations in January; a barn-sale barrel with a few drainage holes drilled through the bottom makes a ready-made village scene.