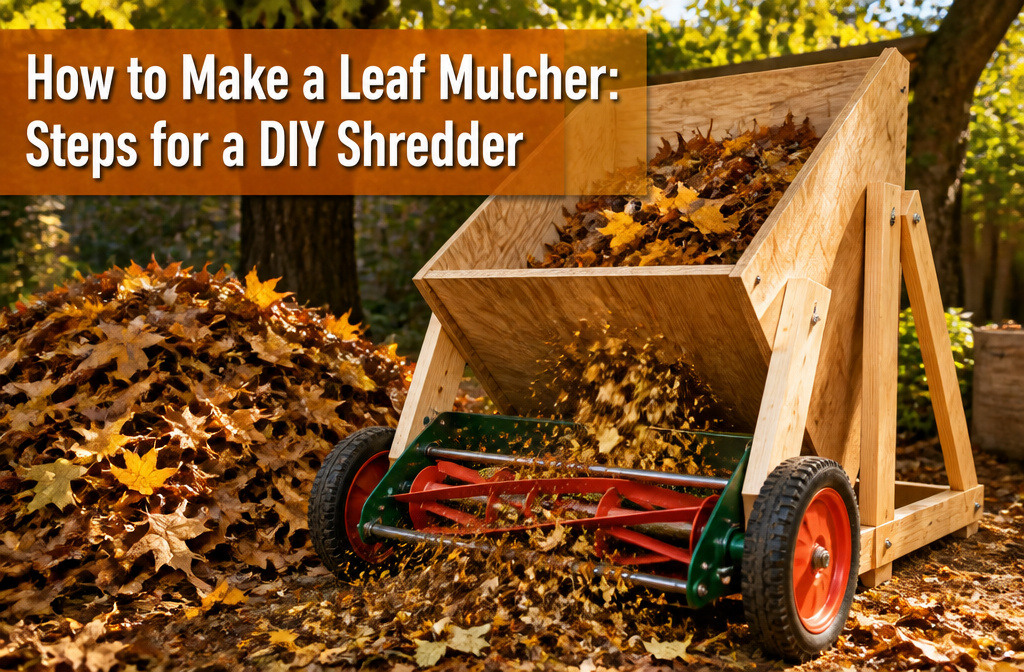
A working leaf mulcher built around a 16-inch reel mower costs a Saturday and scrap lumber if you already own the mower, or less than $30 for a mulch plug if you do not. Most builds fail at the frame, where flex throws the reel out of alignment with the hopper and jams the whole machine. Getting that joint square with a carpenter’s triangle, and adding a diagonal brace before you ever mount the mower, is what separates a mulcher you can push leaves through from one you push into the corner of the garage.
1. Gather Your Materials
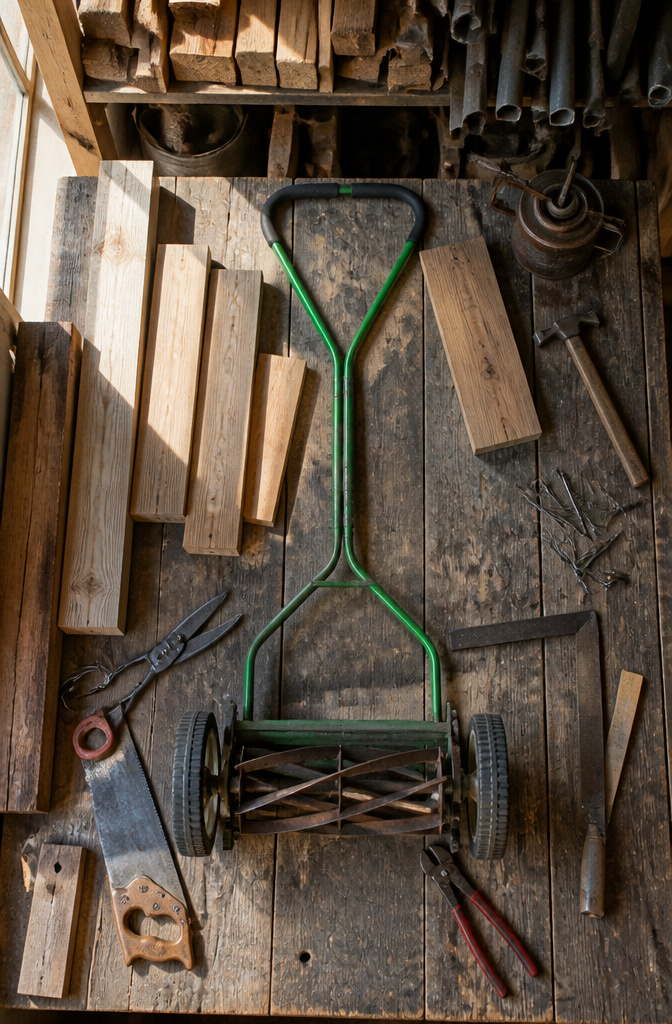
A reel lawn mower with a 16-inch reel width forms the heart of this build, and most of the rest comes from the lumber aisle or the scrap pile. Two-by-fours and two-by-sixes work for the frame, fastened with two-and-a-half-inch wood screws and construction adhesive if you go that route. Expanded metal, roughly 22 by 16 inches, sits behind the reel to catch what gets shredded. For the hopper, sheet metal or flashing guides leaves down into the blades.
Hand tools cover most of the cutting and fitting: a wood saw, sheet metal snips, tape measure, framing square, marker and pencil. A cordless drill with assorted bits, a pop rivet tool, plus a pile of one-eighth-inch diameter by half-inch long pop rivets with backup washers and about two feet of number-10 steel wire round out the metalwork. Leather gloves are non-negotiable.
If this collection sounds like more trouble than your Saturday allows, a mulch plug for a riding mower runs less than $30 and handles the same job without the build.
2. Build the Frame
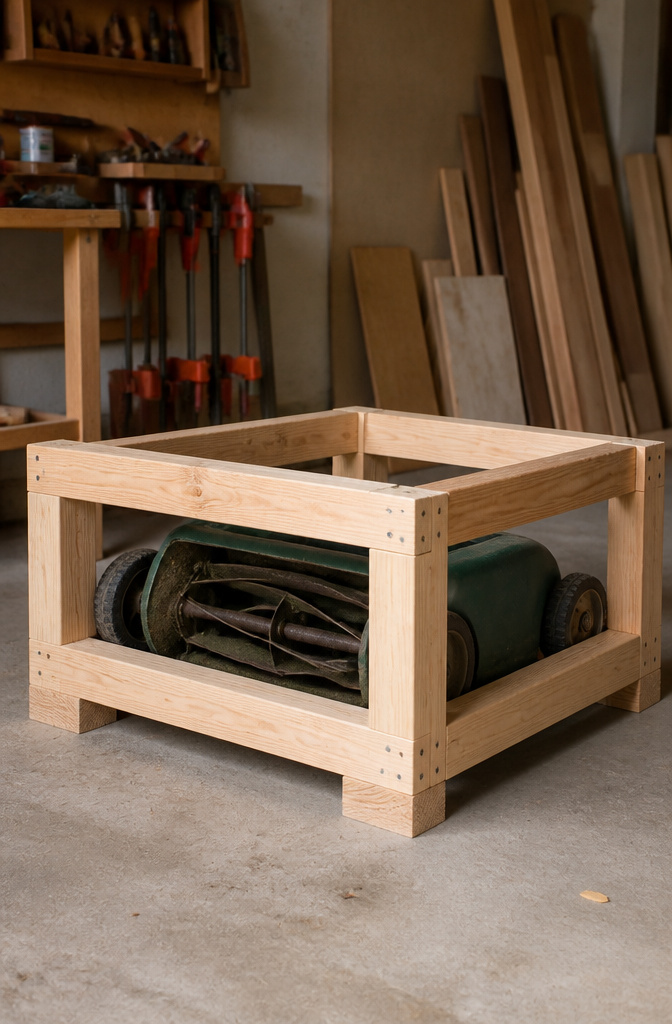
The frame is what keeps everything from shaking apart the second the reel mower starts turning. I built mine from 2x4s and 2x6s, joined with 2 1/2" wood screws and construction adhesive. The screws do the holding; the adhesive fills the gaps and keeps the joints from working loose over a season of wet leaves and vibration.
Exact dimensions will depend on what you have on hand and how much space your mower needs. Lay the reel mower on the ground first and build around it, giving yourself two or three inches of clearance on each side for the hopper later. The 2x6s work well for the base rails where the weight sits, while the 2x4s handle the uprights and crosspieces.
Wobble is the enemy here. A frame that flexes will throw the mower out of alignment with the hopper and jam the whole works. Check for square with a carpenter’s triangle as you go, and add a diagonal brace if the long side starts to rack. Mine sat on uneven ground, so I shimmed one corner with a cedar wedge rather than trust the legs to equal themselves out.
3. Modify the Reel Mower
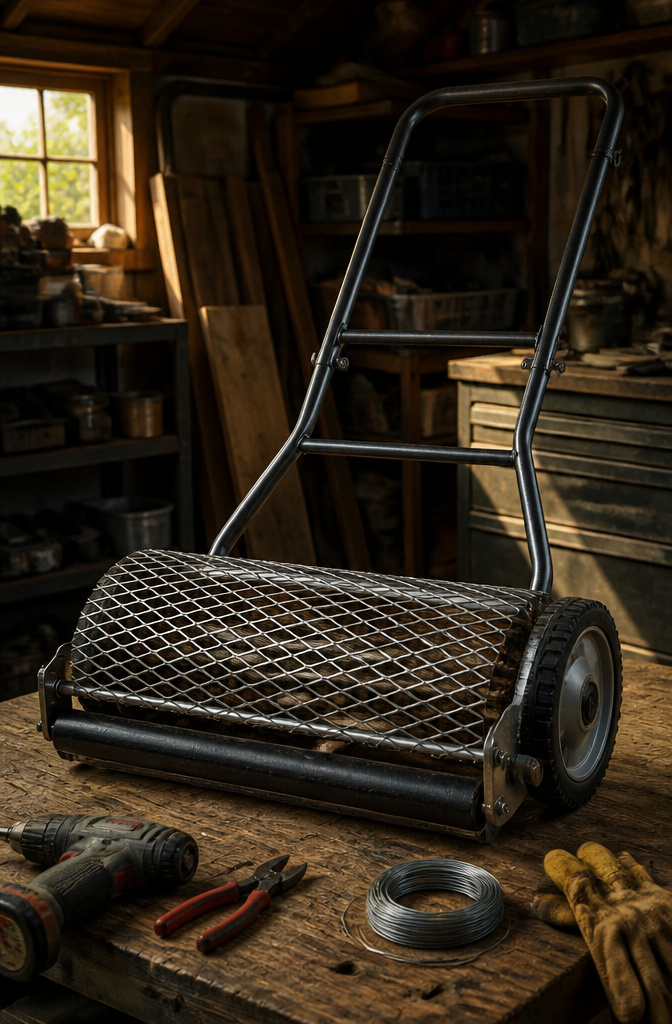
A 16-inch reel width matches the original 1966 design and gives enough cutting surface for a home pile without making the whole rig unwieldy. I checked my own mower against that measurement before going further.
The expanded metal screen is what actually shreds the leaves, so getting it tight matters. I drilled holes through the cutter blade and wired the screen in place with #10 steel wire, then ran another line up to the upper bar. A short piece of steel bridged the loose end, fastened with more wire. The stuff fights you; it is hard and awkward to bend, and yellow paint from some previous life made it slippery in my hands. Take your time here. A loose screen flaps, and a flapping screen does not cut.
The reel itself stays dangerous once this is done. I run a lockable bar through the blades when I am not running the machine. The teeth are sharp, they spin, and a garage is dim enough that you can forget where your hands are.
4. Mount the Mower to the Frame
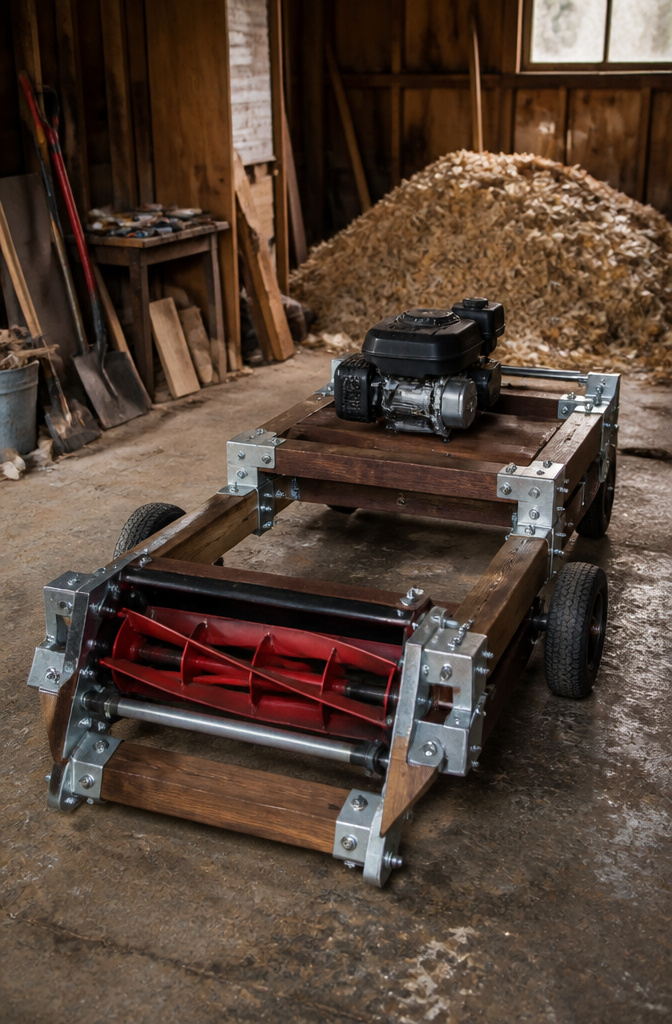
The modified mower needs to sit on the frame so the reel spins freely but the body stays put. I used two Simpson metal ties, a 5 x 6 and a 6 x 8 shelf bracket, with 1/4 inch bolts, nuts, lock nuts and washers to fasten the mower down. The reel must still turn by hand once everything is tight; if a bolt blocks the blades or the frame pinches the housing, back up and shift the bracket before the motor ever gets involved.
Sturdiness at this stage is relative. The setup held fine for my dry run, but the real test comes once the electric motor hooks in and the drum starts taking torque. For now, spin the reel a few times, push the frame side to side, and tighten anything that shifts. When the machine is idle, I run a lockable bar through the reel so it cannot turn. The blades are sharp and exposed, and a reel that spins from a bump is a hazard worth blocking.
5. Cut and Fit the Hopper
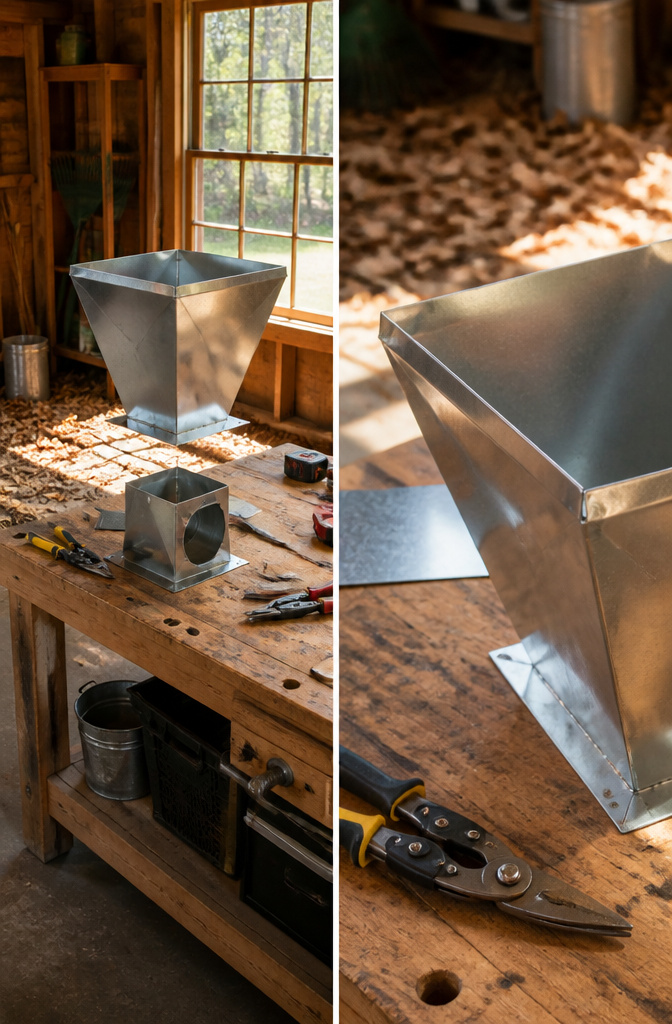
Flashing material from a neighbor’s scrap pile works fine for the hopper walls, though you may need to piece sections together if the roll isn’t wide enough. I traced the shapes onto the metal with a permanent marker, then cut with tin snips. The seams at the top show where I spliced two strips, but the joint faces backward and doesn’t affect the feed.
A small 18-inch sheet metal brake handles the sharp corners; for wider bends I clamped the metal between two custom-cut 2 x 4s and pulled slowly. The hopper needs to sit over the reel without gaps where leaves can spray out, so test the fit against the mower deck before you rivet anything. Mine overhangs the reel by about three inches on each side, enough to hold a armful of dry leaves but not so deep that the mower bogs down. The front lip angles down at roughly 45 degrees to keep material moving; too steep and leaves bridge across, too shallow and they blow back out.
One-inch-and-a-half holes drilled through both side walls let the reel shaft pass through. I put them on both sides so I could run a hand crank on one end and later swap in a pulley for motor drive.
6. Attach the Hopper
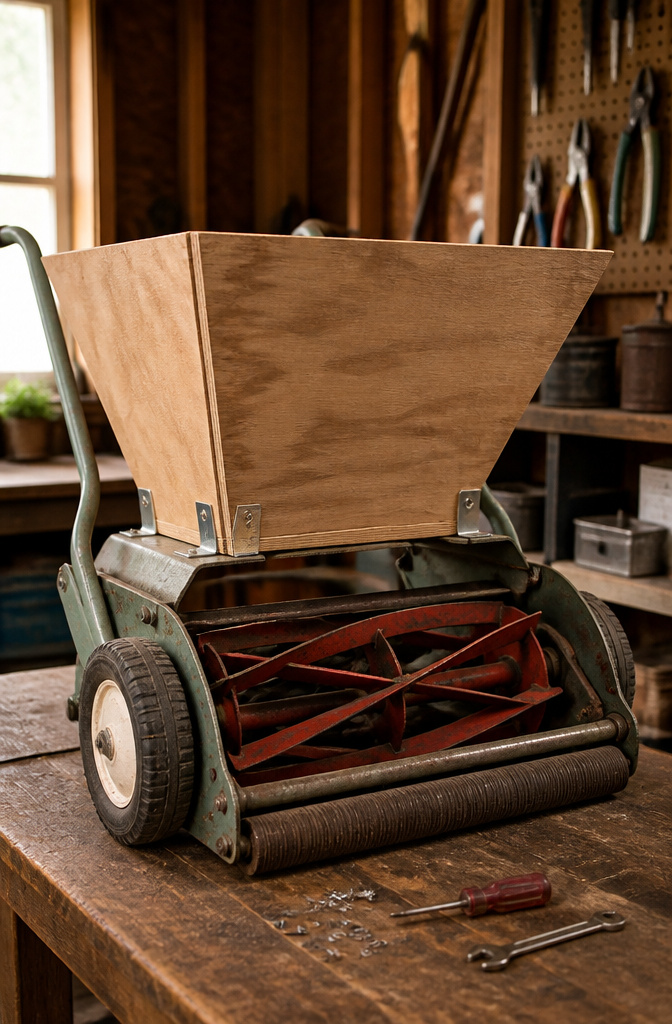
The hopper drops into place over the modified mower, and this is where the whole thing either works or fights you. I fastened the front with two angle brackets, pop-riveting them to the hopper metal and then screwing them into the frame. The rear hangs from two straps, attached the same way. What matters is the alignment: leaves need to fall straight onto the reel, not off to one side or onto the axle posts.
I drilled 1 1/2-inch holes on both sides of the hopper, lining them up with the reel shaft posts. That leaves a hand crank on one side now, with the option for a pulley and motor on the other later.
Spin the reel by hand before you tighten anything. If the hopper lip catches even slightly, leaves will jam every third load. Run your palm along every inside edge facing the operator too. A burr or a raw rivet end will find your knuckles fast, and this is the wrong place for a cut.
7. Add Wheels for Moving It
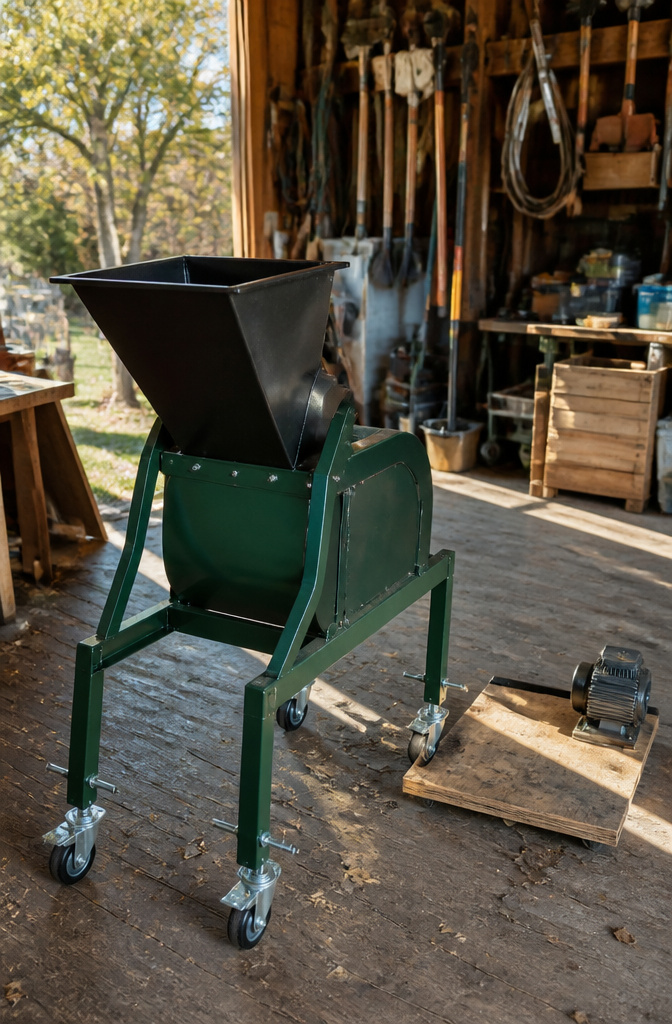
A finished leaf mulcher weighs more than it looks, and wrestling it across a yard every weekend gets old fast. Wheels that lock or retract solve this without letting the frame skate around while the blades spin.
The build I studied used height-adjustable wheels salvaged from an old mower, bolted to the front legs so they could spin up out of the way when stationary and drop down for rolling. That adjustability matters more than wheel size; a fixed caster leaves the mulcher either too low to clear grass or too high to stay put. A plywood platform added at the front also gave a place to mount a motor later, turning the wheel bracket into dual-purpose framing.
If you are buying new, look for locking casters with a brake pedal you can hit with your foot. A rolling mulcher that drifts an inch while you feed wet leaves through the hopper is a mulcher you will not use twice. Stationary legs at the rear, wheels only at the front, keeps the balance predictable: tilt back to roll, set down to work.
8. Install a Handle and Lock
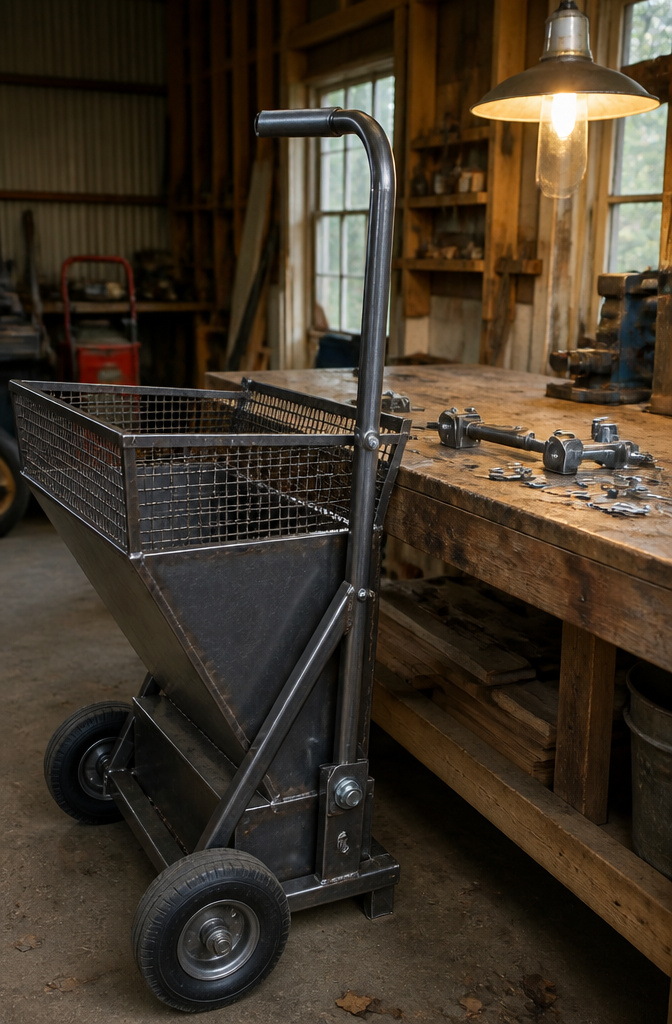
A handle on the back or top of the frame lets you push or pull the mulcher without bending to grab the axle or motor mount. A short piece of steel tubing welded or bolted at a comfortable height works fine; the exact angle matters less than making sure your knuckles clear the hopper edge when you turn. The part I skipped once was the lock, and clearing a jam from the reel cost me a morning in the emergency room getting stitches. A simple pin through the reel and the frame, or a bolt that threads through both, stops the blade from spinning the instant the motor stops. Drill the hole so the pin drops in from above and gravity holds it; if you have to hunt for a clip or a cotter pin, you will eventually skip it when the leaves are wet and you are in a hurry. Test the lock with the motor off and your hand well away, then test it again after the first real jam. The five minutes this takes saves more than time.
9. Add a Motor
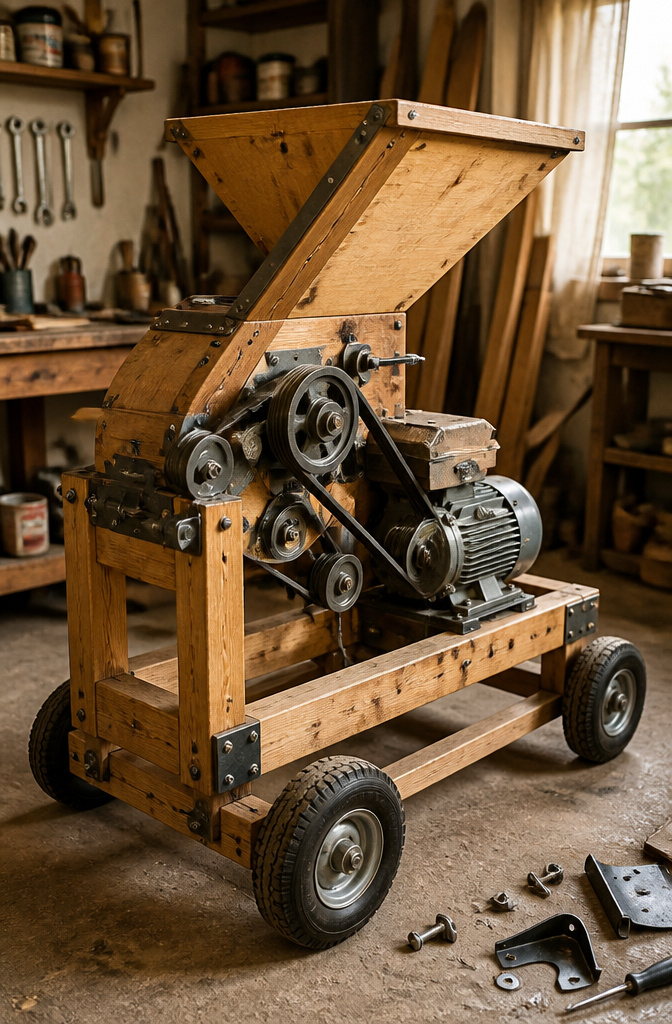
An electric motor turns the reel mulcher from arm work into something you can run while you rake the next pile. I mounted a 1/3 to 1/2 horsepower motor to the frame with a pulley and belt arrangement, and with the current setup the reel spins around 800 RPM. That speed turned out to be too fast for leaves, so I am looking for a larger pulley, 7, 8, or 10 inches, to slow the reel down. The motor and belt need a guard. I bent a piece of wire shelving over a clamped 2 x 4 for the top cover, pop-riveted two straps to the hopper, and secured the motor end with a 2 x 4 on the legs and a piece of 3-inch plywood. Keep the motor dry, plug into a GFCI outlet, and never remove or bypass the guards. The blades stay sharp and spin fast enough to take a finger, so I also run a lockable bar through the reel when it is not running so no one can bump it into motion.
10. Test Before First Use
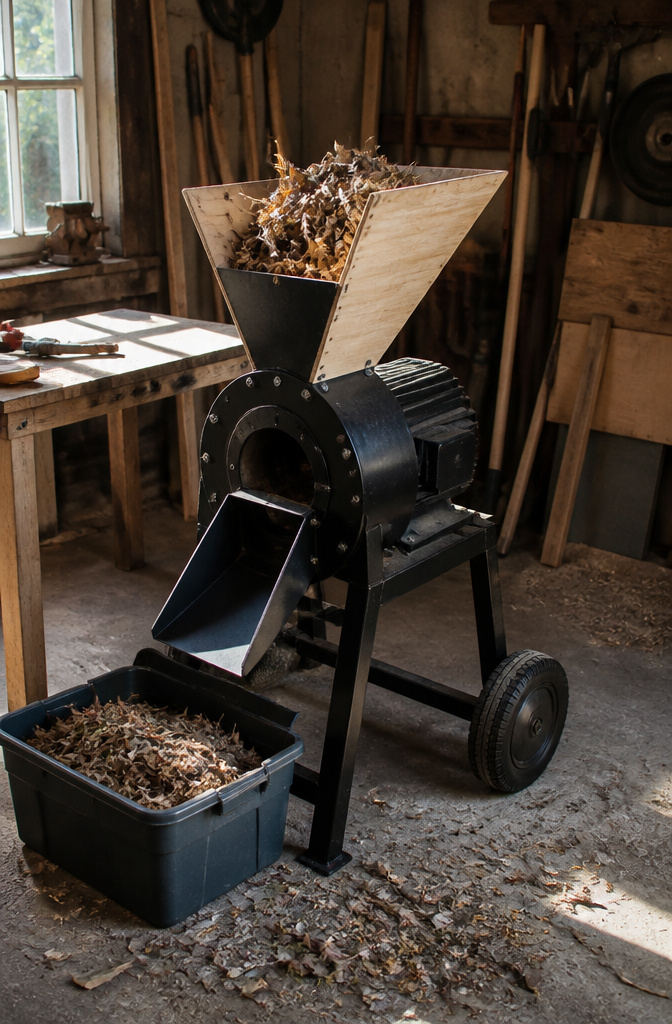
A dry run saves the motor and your fingers. Feed a small handful of leaves through the hopper and watch whether the reel spins freely and the material pulls down without jamming. Stop the instant you hear metal scraping metal, because that means the blade frame or drive shaft is out of line. Goggles and gloves belong on before you plug anything in, not after something kicks back. The motor should pull steadily; if it labors or you catch any whiff of hot wiring or smoke, cut power and hunt for the bind before you go again. A rattle that wasn’t there during assembly usually traces to a bolt you finger-tightened and forgot to lock down. Ten minutes of listening now beats replacing a burned-out motor next weekend.
Other Ways to Make Leaf Mulch
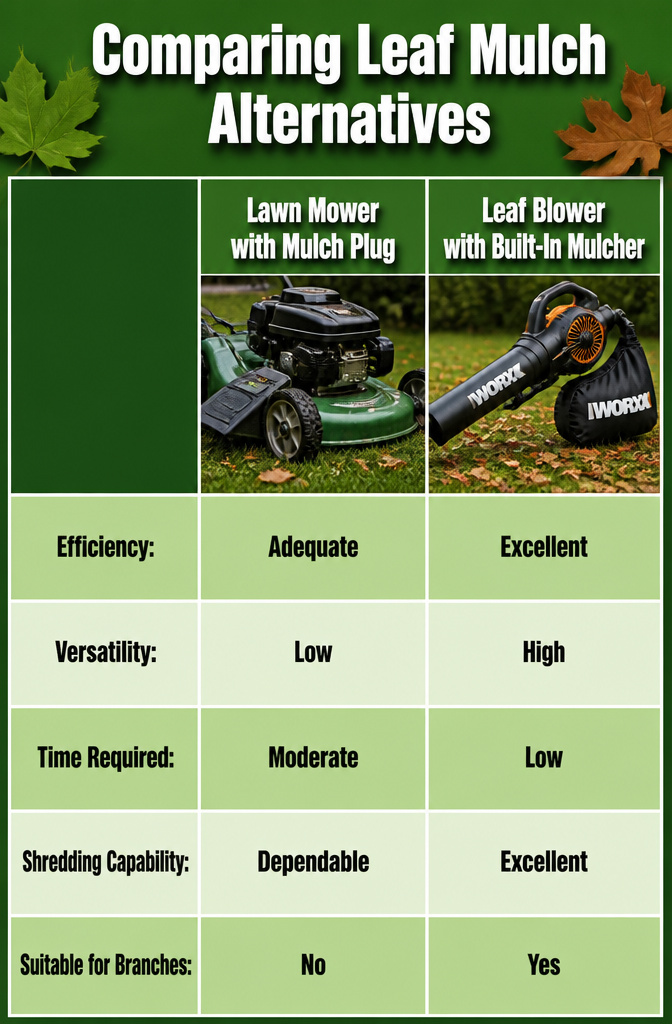
Not every yard needs a homemade shredder. These six alternatives each skip the build entirely and still get leaves broken down small enough to use.
- Lawn mower with a mulch plug — A mulch plug blocks the side discharge and keeps leaves circulating under the deck until they are shredded fine enough to fall back onto the grass. One trial found the plug alone handled leaves adequately, though swapping in mulching blades later is an option if the cut looks uneven.
- Leaf blower with built-in mulcher — Some blower-vac models draw leaves up through a tube, shred them with an impeller, and collect the debris in a bag. The WORX leaf mulcher line works on this principle, dropping shredded material straight into a bin.
- Dedicated leaf shredder — Stand-alone machines like the Mighty Mac Leaf Cycler chip, shred, blow, vacuum, and bag. They accept small branches along with leaves and feed directly into a nylon mesh bag.
- Hand-held leaf vacuum — A smaller, carried unit with shredding capability. Run it over a raked pile and it reduces volume enough to fit more leaves into fewer bags or a tighter compost bin.
- Leaf mold, unrushed — Rake whole leaves into a pile and wait two to three years while fungi break them down. Shredding first speeds this up by increasing surface area and preventing the layers from packing into moisture-proof mats.
- Manual shredding — Running a lawn mower over a thin, raked layer a few times still counts. For tiny batches, shears or a rake drawn repeatedly through a pile will do, though the wrist effort adds up fast.
What Leaf Mulch Does for Soil
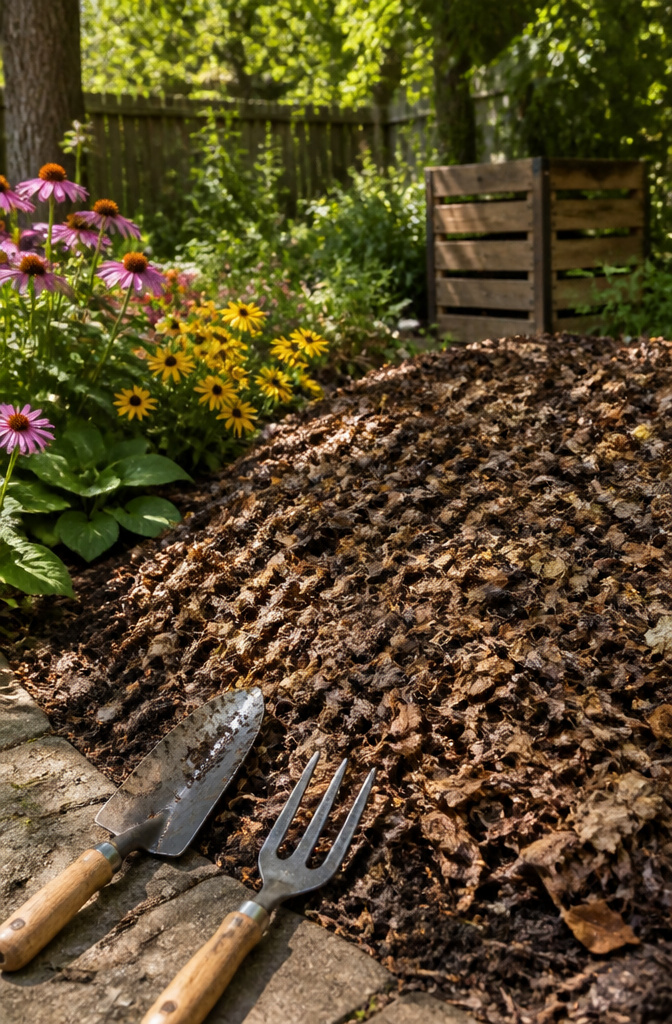
Shredded leaf mulch does five things for soil that gardeners across every source seem to agree on. It holds moisture in garden beds through dry spells, so you’re not out there with the hose every afternoon. The leaves themselves carry nutrients the tree pulled from deep soil all season, and once broken down, that food feeds the bed below. A layer of the stuff also blocks light from weed seeds, which means less time bent over pulling crabgrass. On slopes or anywhere rain runs hard, the mat keeps dirt from washing away. And honestly, a bed topped with brown shredded leaves just looks tended, not abandoned.
The depth matters. Pile shredded leaf mulch up to 6 inches thick over the area you want to cover. Whole leaves mat down and suffocate what’s underneath, but shredded pieces let air and water through even at that depth. That six-inch figure is the working maximum; go thinner and you lose the weed suppression and some of the moisture hold.
Which Leaves Work Best
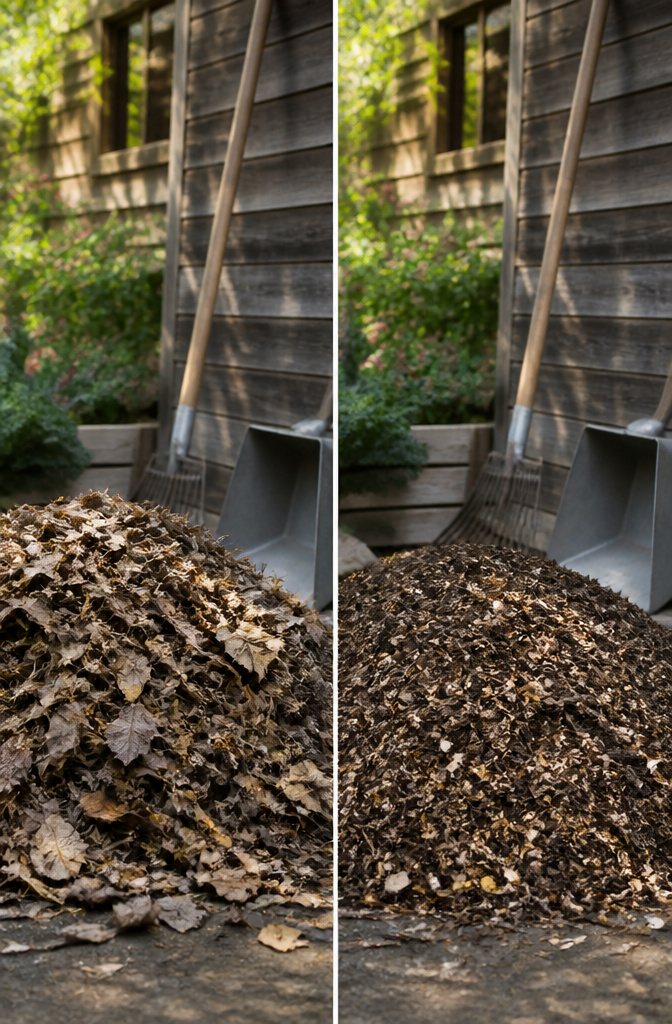
Thin leaves like birch break down fast enough that you can almost watch them shrink, while thick ones from an oak or chestnut sit there for months looking barely changed. That difference matters when you’re deciding how hard to run your DIY shredder. The first year I piled leaves straight from the yard, I learned the hard way: the birch half turned to usable mulch by spring, but the oak layer was still intact enough to rake like whole leaves. Shredding oak or holly twice, or feeding them through a tighter gap, saves you from finding half-finished mulch come planting season. Mixing types helps too. A pile of all-oak leaves, high in lignin, breaks down slower than a blended pile where the quick-decay types carry some momentum into the tougher stuff. If your yard is mostly oak, borrow a neighbor’s maple or birch clippings, or plan on that leaf mold sitting for closer to two years rather than one.
Storing Shredded Leaves
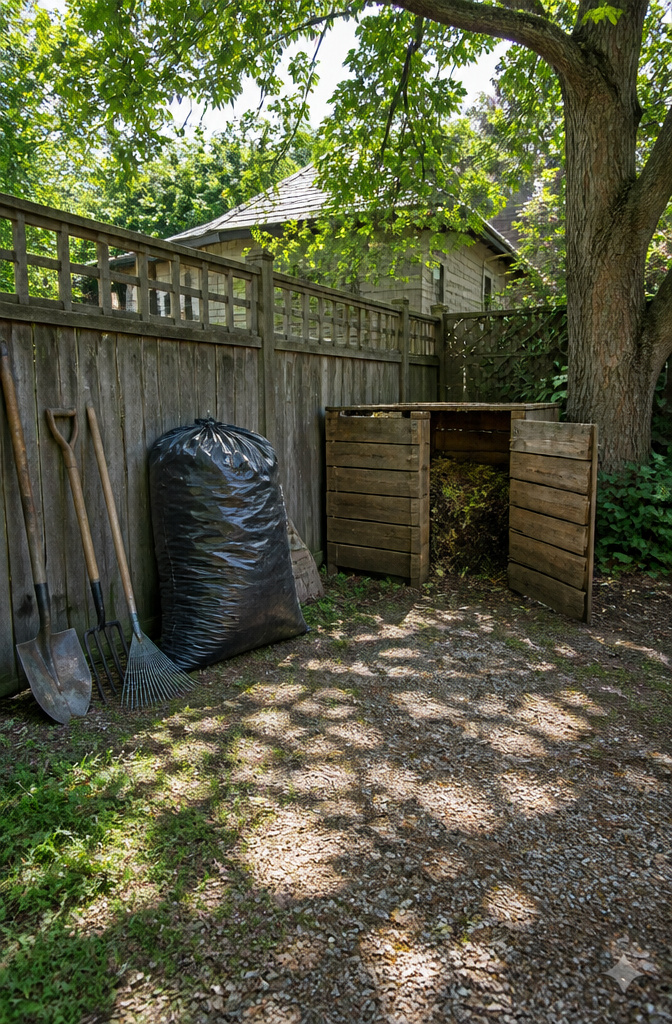
Shredded leaves need a dry, shaded spot while they wait. A compost bin works, but black trash bags do too: moisten the shreds, close the bag, poke a few holes in the sides, and set them aside. The pile will shrink over winter, so shifting it around once a month helps it break down faster.
If you can wait a year or two, leaf mold is the payoff. Same leaves, same bags or bin, just more patience than the spring mulch route. The finished stuff looks like the crumbly brown layer under dry leaves in a forest: cocoa brown, earthy smell, holds moisture like nothing store-bought. Most gardeners here skip it simply because you have to make it yourself.
Why Whole Leaves Fail as Mulch
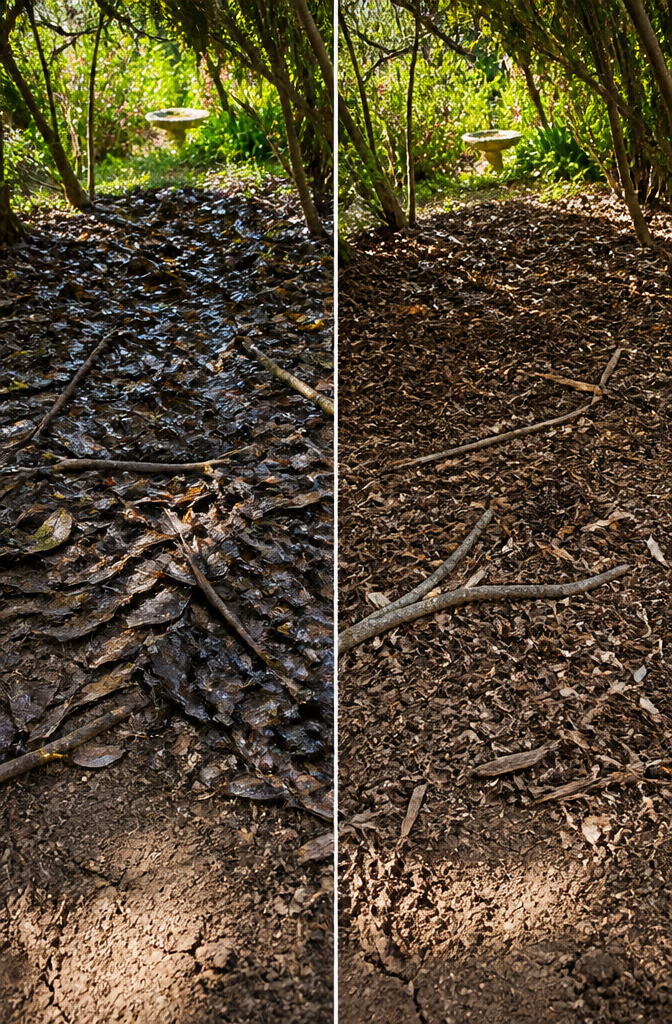
Whole leaves left in place will flatten into a dense sheet that blocks both air and water from reaching the soil beneath. I have seen this mat form in forgotten corners of my own yard, the leaves fused together into chunks you could lift like sod. The soil underneath stays dry and compacted, and any grass or plants trapped below suffocate slowly.
Shredding breaks that mat apart. A pile of whole leaves might take two or three years to decompose on its own. Shredded leaves, with their multiplied edges and surface area, give soil organisms far more entry points to work with, and the material breaks down in a fraction of that time. The difference is not just speed. It is whether the mulch functions as a living layer or seals the ground off like a tarp.
Frequently Asked Questions
What are the benefits of leaf mulch?
Shredded leaf mulch holds moisture in garden beds, returns nutrients the tree pulled from deep soil, blocks light from weed seeds, prevents soil erosion on slopes, and gives beds a tended appearance. A layer up to 6 inches thick works best; shredded pieces let air and water through even at that depth, while whole leaves mat down and suffocate what is underneath.
How do you store shredded leaves?
Keep shredded leaves in a dry, shaded spot such as a compost bin or black trash bags. If using bags, moisten the shreds, seal the bag, poke a few holes in the sides, and shift the pile around about once a month so it breaks down faster. Over winter the volume will shrink noticeably.
Can you just let leaves pile up in the garden as mulch?
No. Whole leaves flatten into a dense sheet that blocks both air and water from reaching the soil beneath, and the soil underneath stays dry and compacted. Plants trapped below suffocate, and the mat can take two or three years to decompose. Shredding breaks the mat apart and gives soil organisms far more surface area to work with.
How do you make leaf mulch fast?
Shred leaves before winter for best results. A lawn mower with a mulch plug, a leaf blower with a built-in mulcher, or a dedicated shredder all speed the job. Once shredded, shift the pile about once a month through winter; the material decomposes faster with more edges exposed to soil organisms and reduces in volume by spring.